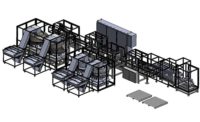
Automated 3D Inspection System Detects Weld Defects

Automated inspection technology can detect a variety of defects, such as this skipped weld in an automotive roof.
Photo courtesy Bluewrist Inc.
Water is not good for electric vehicle batteries. Water in the battery compartment can cause short circuits, power failure or even fire. As a result, battery enclosures must meet stringent ingress protection ratings, often IP67 or higher.
To meet that rating, the battery compartment must be carefully assembled and meticulously inspected. This was the challenge faced recently by a manufacturer of high-performance EVs. The vehicle’s battery tray requires more than 500 rivets and 100 welds. With an anticipated production volume of more than 65,000 vehicles annually, the inspection cycle for each tray had to be completed in less than 200 seconds.
The tray weighs approximately 80 kilograms and is 4 meters long and 1.5 meters wide. Numerous welds must be completed without any defects before a sealant is applied. This process is essential to produce an airtight, leakproof joint and to create seals that can accommodate the battery pack’s thermal expansion and enable it to withstand vibrations and stress when the vehicle is on the road.
Since the assembly process involves more than 20 steps, quality control must be comprehensive to ensure that defects are identified at an early stage and reworked. If problems are identified too late in the process, the part must be scrapped.
To guarantee structural integrity, each weld must be inspected. Afterwards, the height of each rivet must be checked with an accuracy of ±0.1 millimeter, since the height of the raised round rivet heads determines how much pressure must be applied when the sheets are joined. Finally, various holes, slots and mounts must be inspected to comply with specifications.
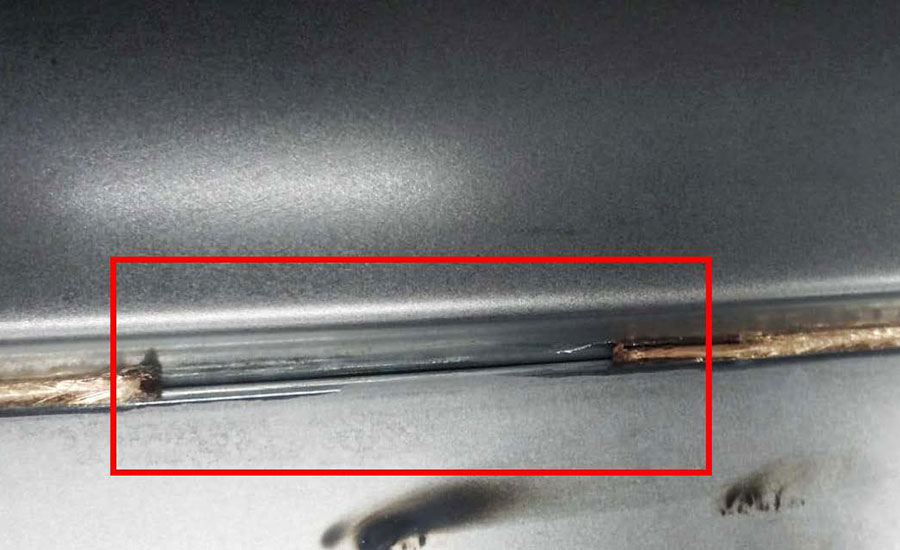
Automated inspection technology can detect a variety of defects, such as this skipped weld in an automotive roof. Photo courtesy Bluewrist Inc.
Robots Automate Inspection
To accomplish these tasks, the carmaker turned to Bluewrist Inc. in Ann Arbor, MI. Bluewrist developed an inline 3D vision inspection system that can continually monitor production quality.
Working with the OEM, Bluewrist designed a system that uses two six-axis robots from FANUC and two 3D laser profile cameras from LMI Technologies. As the robots carry out high-speed inspection of all the critical features, the results are recorded and a 3D point cloud is processed and verified against specifications to identify any defects.
The profilers capture detailed surface characteristics of each weld. The weld profile can be inspected in its entirety or broken down into individual sections for analysis and comparison against blueprints to guarantee conformity to length, width, throat thickness, and leg length. The system can inspect fillet, lap, butt, corner, T-joint and plug welds.
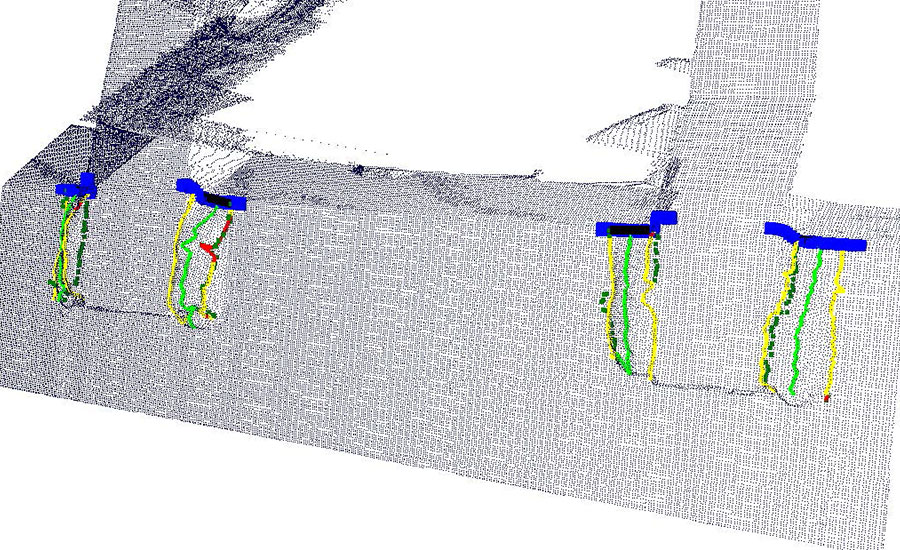
As the robots inspect the assembly, the results are recorded and a 3D point cloud is processed and verified against specifications to identify any defects. Photo courtesy Bluewrist Inc.
Although the OEM opted to mount the profilers on robots, the sensors could be stationary or they could be mounted on linear slides.
The system can detect a variety of welding defects, including burn through, spatter and debris, porosity, cracks, undercuts, discontinuity, and off-location welds.The system can inspect welds at a speed of up to 320 millimeters per second and a resolution of 0.1 millimeter.
Given the complexity of the battery tray, Bluewrist tested the system extensively with feasibility studies before deploying it on the production line. In production, the system performs all the inspections in less than 200 seconds.
When a weld defect is detected, the part is automatically rejected from the production line for rework and analysis without operator intervention. The actual location of the defect is indicated on a CAD model of the part to aid in accurate and efficient rework.
All inspection data and images can be saved for future reporting, record keeping and review purposes as part of a comprehensive quality assurance program. For traceability, information such as a unique number for each weld, part serial number, and cycle time information are all recorded in the database.
Predictive analytics, real-time trends and custom alarms will inform engineers of potential problems and enable them to avoid costly defects in the future.
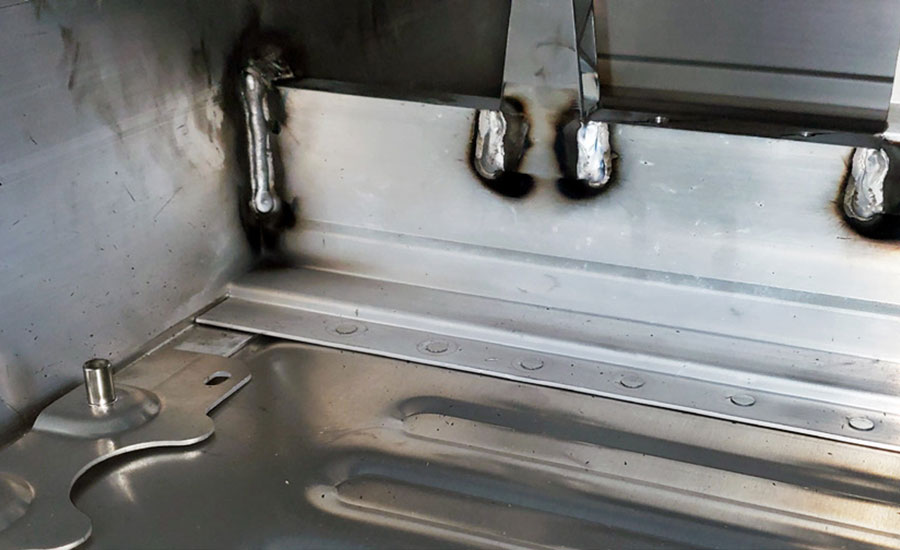
The system can inspect welds at a speed of up to 320 millimeters per second and a resolution of 0.1 millimeter. Photo courtesy Bluewrist Inc.
Inspecting Automotive Roofs
Battery cases are not the only application for Bluewrist’s 3D inspection technology. Another automotive OEM uses the company’s technology to check for groove-weld defects during the manufacturing of vehicle roofs. The OEM wanted to avoid issues such as spatter, burn through, and missed welds. A previous weld inspection system using a 2D inspection station hadn’t worked, and the client was using a manual visual inspection process to identify places where work needed to be redone.
Proper welds are critical for safety, because they ensure the structural integrity of the vehicle’s safety cage in the event of an accident. Welds are made along all four sides of the roof. All totaled, the roof contains some 3 meters of welds. Many of the defects are small, often no more than 0.5 millimeter, but manual inspection is only able to consistently detect defects that are 3 millimeters and larger. This resulted in errors being passed down the assembly line.
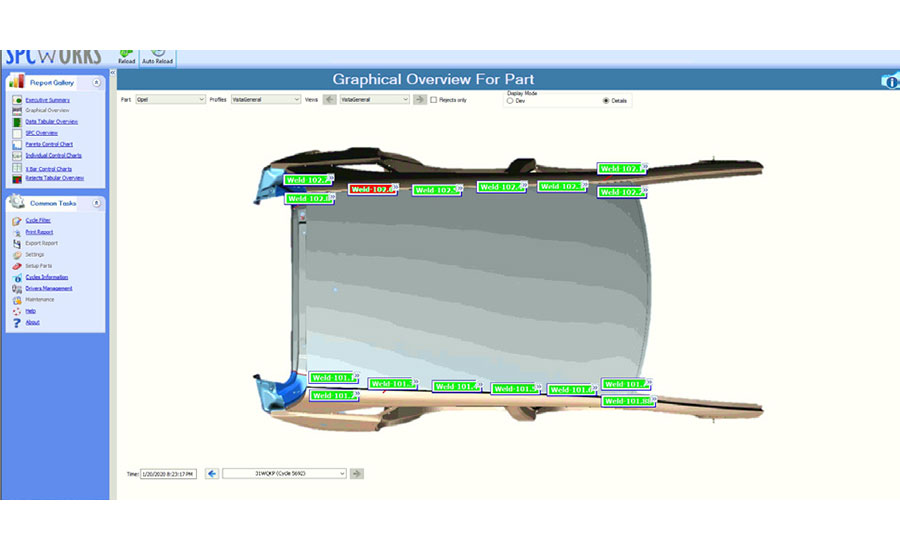
The software shows the location of the defect on a CAD model of the part to aid in accurate and efficient rework. Photo courtesy Bluewrist Inc.
Bluewrist developed a system using an UR 10 collaborative robot mounted upside down on a gantry, together with a 3D laser profiler. The system operates alongside quality assurance staff to inspect the groove welds.
One challenge of the application is that car bodies are transported on the line on skid carriers, which do not always stop at the same location. To solve that problem, the Bluewrist system includes automatic path correction, enabling the robot to compensate for or eliminate process variation of up to 10 millimeters in car position for scanning. This made for a more cost-effective system, since fixtures, pins, sensors or other equipment is not needed to eliminate the positional variation.
As the vehicle body enters the inspection area, the robot scans the roof welds while staff sequentially check the welds. The weld is scanned at 200-millimeter intervals at a speed of 150 millimeters per second. The results are processed in real-time, and inspections are performed eight times on each side of the roof. After each weld is scanned, the data is sent to Bluewrist’s SPCWorks database, so it can be analyzed progressively in parallel fashion. This reduces overall processing time. The entire process can be completed in 34 to 36 seconds.
Once scanning is complete, the assembly line diverges based on the results of the inspection. If the scan shows the component is produced correctly, a QR code is printed on to the car body, and the PLC is triggered to send the body along the line to continue the assembly process. If the welding does not pass the quality assurance stage, a QR is still printed on the vehicle, but the body is sent to a rework station.
The software can display the inspection results and pinpoint the location of any defects for quality assurance staff to facilitate remedial work. The system is capable of handling 33 cars every hour (800 a day) and provides accurate and consistent results.
Bluewrist also makes 3D vision technology for dimensional inspection, as well as inspecting electrical connectors, automotive door panels and beads of adhesive. The company’s technology can also be used for guiding robots.
For more information on welding and inspection, read these articles:
Inspection With Thermal Imaging
Beyond the Welding Line: Robots and Automotive Assembly
Sensors Make Robots Smarter When Inserting Vehicle Windshields
Looking for a reprint of this article?
From high-res PDFs to custom plaques, order your copy today!


