Air Tools for Heavy-Duty Crimping

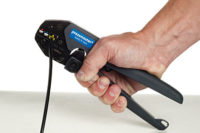
Air-powered crimping tools provide the best of both worlds—the power of a stationary press with the portability of a hand tool. Photo courtesy Fabco-Air Inc.


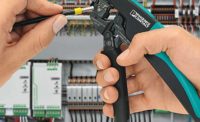
Metal sleeves are usually applied to each end of a wire rope to prevent it from fraying and to help connect the rope to a mechanism or structure. Photo courtesy Loos and Co. Inc.


Wire rope consists of several strands of steel wire twisted into a helix. Most wire ropes are made from uncoated high-carbon steel wire, but they can also be made from galvanized wire or stainless steel wire. They are available in diameters ranging from 1/32 to 5 inches or more.
Wire ropes are used dynamically for lifting and hoisting in cranes and elevators. They’re also used to transmit mechanical force. For example, wire ropes connect the control surfaces of some airplanes to levers and pedals in the cockpit. In automobiles, wire ropes can be used to actuate the parking brake, gear shifter and throttle.
Metal sleeves are usually applied to each end of a wire rope to prevent it from fraying and to help connect the rope to a mechanism or structure. Metal sleeves can also be used to splice two wire ropes together.
These sleeves are crimped, or swaged, to the wire rope using a press or a manual or powered hand tool.
While presses can certainly apply enough power to crimp a sleeve to a wire rope, they are stationary. They can’t be used to make terminations in situ.
Manually operated hand tools are portable, but there’s a limit to how much force they can apply. Moreover, repeated actuation in a production environment can be an ergonomic issue.
Handheld pneumatic tools provide the best of both worlds—the power of a stationary press with the portability of a hand tool.
Air and a Cam
Fabco-Air’s 300 series of pneumatic tools achieve tremendous crimping power from force-multiplying air cylinders combined with cam-operated jaws. The power cylinder has three pistons attached to a common shaft. Each piston is isolated within its own chamber by means of baffles integral with the outer cylinder wall. Special internal porting through the rod allows air pressure to simultaneously energize all pistons and transmit more than 1,700 pounds force directly to the cam and power head.
Force is increased through the cam and jaws to approximately 4,000 pounds at a distance of 1 inch from the tool and approximately 2,500 pounds at a distance of 2 inches.
They are available in both handheld and bench-mounted models, so engineers can bring the tool to the work or centralize assembly work at a bench. The units are lightweight and portable, so assembly lines can be readily moved and adjusted to optimize production.
The tools can handle wires ranging from 1/32 to 3/8 inch in diameter. They run on standard shop air pressure of 85 to 95 psi. Dual triggers allow the tool to be operated using either the left or right hand, with or without gloves.
The tool is ergonomically balanced at the triggers, which helps to minimize operator fatigue. A shoulder strap allows one-handed operation.
A wide selection of single-groove and multi-groove power heads is available. The power heads can be interchanged in less than a minute on either bench-mounted or portable tools.
For safety, the tool operates in a multistep process. Depressing a white button at the top of the handle opens the jaws to receive the workpiece. Releasing the button allows the jaws to spring closed and grip the parts securely. Pulling either of the red triggers releases a lock so that the valve can be tripped by squeezing the index finger. This actuates the power cylinder and drives the cam-operated jaws into their closed crimping position.
The bench-mounted version operates in much the same way. Like the handheld model, the bench model is equipped with spring-loaded crimping jaws that are normally closed for safety. The bench model is actuated via a foot switch. Pressure on valve A opens the jaws so the wire and sleeve assembly can be inserted. Releasing valve A allows the crimp jaws to close lightly and hold the assembly securely in place. Foot pressure on valve B activates the crimping cycle.
The benchtop tool’s control box includes a pressure-sensing valve that can be adjusted for various crimp pressures. If the supply pressure should fall below the sensing valve’s pressure setting, the valve will not provide a “crimp” signal to the tool. This prevents the tool from making a bad crimp and ruining the parts.
Larger cables may require higher forces for sufficient crimping. An optional booster accessory is available to increase air pressure to the tool to an acceptable level.
Making Splices
Lap or running splices can be made with oval sleeves when lengthening cable or making grommet slings. Oval sleeves are widely available in a variety of materials, including aluminum, copper, zinc-copper, tin-copper and stainless steel. Two sleeves are typically needed to develop a splice equal to the breaking strength of the wire.
To make a splice, pull one end of each cable through both sleeves. Leave a little space between the sleeves to allow for extrusion of the sleeves during crimping. Also, the finished crimp should have some space between sleeves to provide cable flexibility. Line up the sleeve between the tool jaws with the long axis crosswise to the jaws.
Looking for a reprint of this article?
From high-res PDFs to custom plaques, order your copy today!


