Supply chain delays continue to plague manufacturing, leaving companies with limited options to overcome the problem. The two most common approaches are to either diversify into multiple markets or improve one’s product quality and service.
Gloucestershire, England-based Impcross Ltd. has been a component manufacturer for the aerospace industry since 1969, so the first option is not viable. Instead, Impcross focuses solely on deepening its commitment to world-class engineering and manufacturing of precision parts for renowned OEMs like Safran Landing Systems, GE, UTC Aerospace Systems, Dowty Propellers, BAE Systems plc, NSK Ltd., Honeywell and Rolls-Royce.
One way the company achieves this is by investing heavily in high-quality machine tools. Another way is through regular user of metrology equipment made by Mitutoyo Ltd. In fact, two Mitutoyo coordinate measuring machines (CMMs)—the BHN 706 and Euro C 7106—have been used daily for more than 20 years thanks to continual software updates, and regular calibration and maintenance.
Steve Arnold, managing director at Impcross, points out that, on a monthly basis, the company manufactures and inspects more than 500 different types of aerospace components. This work volume requires the company to run its machine shop and metrology department 24/5, with full traceability of its production line and inspection procedures.
In 2016, Impcross won a contract to manufacture aluminum reverse thrust valve housings for a defense customer. A critical feature of the housing is a thread that connects to a hose with a through pressure of 5,000 psi. To guarantee conformity, the customer supplied Impcross with a Mitutoyo Contracer CV-4500 instrument to measure the thread forms, which have a tolerance of less than 50 microns.
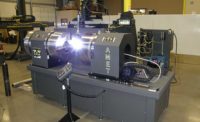
Impcross also manufactures a sleeve guide (more than 200 per month) that works in conjunction with the housing. Made of stainless steel, the guide has a cylindricity and parallelism tolerance of 1.2 microns over its 127.7-millimeter length. Surface finish tolerance is 0.006 to 0.008 millimeter, or 2 microns. Part inspection is done with the Mitutoyo Roundtest RA2200 measuring system.
“The guides are extremely challenging parts, but tight-tolerance work beyond the remit of most manufacturers is our day-to-day job,” says Matt Coopey, quality inspector at Impcross. “The RA2200 measures these parts with an efficiency that enables us to produce and inspect hundreds of them monthly.”
All Mitutoyo metrology equipment used by Impcross is equipped with the supplier’s CAT 1000 software. This software lets Impcross directly download CAD/CAM files to equipment from its servers.
For CMMs, datum is easily downloaded and set, according to each model. A newer Crysta Apex S7106 CMM complements the BHN 706 and Euro C 7106 models.
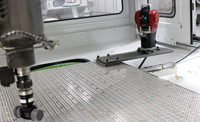
“We won an order to process a family of gyroscope components in batches of 50,000,” notes Arnold. “For this high volume, our CMMs use a grid fixture plate and apply statistical process control to record data for the client. The CMMs regularly check more than 50 parts an hour and run 24 hours a day.
“As a business that captures data at every level, the Mitutoyo equipment has been integral to our success,” concludes Arnold. “We have designed failure out of processes so we can quote with intelligence, and we risk analyze and manage every process.”
For more information on CMMs, call 888-648-8869 or visit www.mitutoyo.com.


