Linear Encoder Limits Variation of Plane Parts

Airbus plants in Germany, Spain, France and the UK use Flow International Corp.’s Composite Machining Center to process skins for wings up to 40 meters long. Photo courtesy Renishaw Inc.

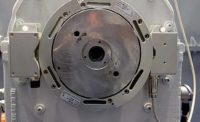
One encoder is located on each side of the Composite Machining Center near the drivetrain, in a duct purged with clean, dry air. Photo courtesy Renishaw Inc.


Regardless of its size, an airplane part needs to be monolithic, with minimal dimensional variation. Such parts ensure better control of the aircraft’s final weight. They also eliminate the need for fixtures and shimming, which can significantly increase assembly time.
To produce large monolithic parts, aerospace manufacturers rely on state-of-the-art machine tools. For example, Airbus plants in Germany, Spain, France and the UK use Flow International Corp.’s Composite Machining Center (CMC) to process skins for wings up to 40 meters long. The CMC performs trimming, drilling, routing, surface milling, marking and inspection of the skin.
A modular machine, the CMC comes in standard X-axis lengths of 6 to 50 meters, as well as custom sizes. It can be configured as a mid-rail gantry or dual travelling column machine. Airbus operates gantry design machines that feature two rams—one for ultra-high-pressure waterjet cutting and one for conventional high-speed routing.
“The temperature differences that the machine sees over a 40-meter length during a 130-hour machining cycle can be relatively extreme, even in an air-conditioned plant,” notes Todd Fuchs, senior electrical project engineer for Flow International Corp. “Between changes in the scale itself and the substrate of the machine, the variables become complex.”
Aware of this, Flow International equips the CMC with Renishaw Inc.’s HS10 or HS20 laser beam encoders, which offer high accuracy linear position feedback (1 micron per meter) on axes up to 60 meters. The encoders have a measuring speed of 1 meter per second with a repeatability of 0.0381 millimeter.
In addition, the encoders serve as permanent scales and provide twice the resolution of a tape scale. They work with any CNC machine that reads A-quad-B signals in RS-422 digital format.
One encoder is located on each side of the CMC near the drivetrain, in a duct purged with clean, dry air. The encoders are placed under bellows so airborne debris does not disrupt the laser beam and destabilize measurements.
An RCU10 compensation unit, working in conjunction with the encoders, features various sensors that monitor the machine tool bed, the part and the ambient environment in real time. As sensor data is received, the compensation unit adjusts the encoder laser beam speed and direction for precise part positioning. One unit supports up to eight sensors when paired with a sensor distribution box, or 32 in a multiaxis system.
The CMC also features a Renishaw RMP60 touch probe to locate the part during setup and confirm finished dimensions after machining. The probe’s compact design allows it to access and measure any point on the part that the machine head can reach. Equally important, its radio signal transmission allows multiple probe systems and other industrial equipment to coexist in noisy industrial environments.
“Some parts, such as wing skins, are seldom a match to the CAD model,” emphasizes Fuchs. “They are worth nearly $1 million, so we probe extensively and do a lot of best fit calculations prior to machining.”
For more information on laser encoders, call 847-286-9953 or visit www.renishaw.com.
Looking for a reprint of this article?
From high-res PDFs to custom plaques, order your copy today!


