Medical Device Manufacturer Uses Pressure-Decay Leak Tester to Improve Throughput, Efficiency

Improving throughput and efficiency was a team effort for this medical device manufacturer.
When a product's success becomes a liability, something has to change. At Hologic Inc., a manufacturer of medical diagnostic and testing products, that happened with our APTIMA Combo 2 Assay test for the sexually transmitted diseases chlamydia and gonorrhea. Hologic, which also manufactures genetically based tests for HIV infection, tuberculosis and Legionnaires' disease, developed the APTIMA as an improvement over its own first-generation PACE test. In doing so, however, we encountered a problem. The APTIMA test, which works by identifying the unique nucleic sequence of the ribosomal RNA of each disease, was almost too sensitive for its own good.
Previously, with our PACE system, clinicians would place swab specimens into capped tubes that were supplied preloaded with fluid transport media. Handling naturally caused the swab and fluid to slosh around inside the tube, often forming bubbles beneath the cap that would pop and release tiny droplets into the air when the cap was removed in the lab. These aerosols were far too small to register on nearby PACE assays, much less have any effect on lab personnel. However, APTIMA is so sensitive it can pick up these tiny aerosol traces and signal a false rRNA detection.
To solve the problem, Hologic developed a new penetrable cap design incorporating a hollow cylinder with a membrane seal across its midplane, another seal across its outer end, and a filter pile packed in between. This cap remains on the tube and allows assay samples to be drawn by inserting a pipette through the seals and filter. The snug fit between seals, filter and pipette prevents any aerosol emission, and the resilience of the filter pile automatically recloses the hole after the pipette is withdrawn. The redesigned cap became part of a broader concept called Direct Tube Sampling (DTS).
Fair enough. But Hologic wasn't out of the woods yet.
Early users of APTIMA immediately began urging us to use the same type of specimen tube and cap for other assay kits. Projections suggested that within a year we would be making 50 percent more DTS caps than expected, and probably averaging yearly gains of at least 20 percent for some time to come. Clearly, we needed a way to produce the caps in much higher volume. However, in doing so we had to continue to test each one for seal integrity.
What had initially been a design problem was now a challenge in terms of assembly and quality control.
Cap Design
The APTIMA cap starts out as an open-ended cylinder molded of natural polypropylene, approximately 5/8 inch in diameter and 11/16 inch long, with a 1/16-inch flange around the inside circumference at mid-length. This flange provides the seat for the internal membrane seal-a disk made of aluminum foil laminated onto a polyester-polyethylene film. The film reinforces the foil's vapor barrier while providing a surface that will bond to the cap's flange through induction welding under pressure. During cap assembly, the inner seal is mounted first, then a strip of filter pile material is coiled and inserted above that seal. After that, a second seal is applied across the cap's upper end to lock the filter in place. Below the lower welded seal, the cap is molded with female threads that screw onto the sample tube.
In the initial production of APTIMA kit components, all caps were made essentially by hand. The inner seal disk was peeled off a Mylar backing and welded in place, after which each cap was leak tested to verify the sealing integrity of both the foil disk and its perimeter weld. To perform this inspection, the caps were taken off line manually and loaded into a 10-up fixture, which applied 10 psi air pressure against the underside of the middle seal. Pressurizing and stabilizing took 2.5 seconds. The test measurements then took another 2 seconds. Acceptance was limited to batches that allowed a pressure loss no greater than 0.007 psig. Accepted caps were carried back to the assembly line for manual addition of their filter pile and upper seal.
As soon as we realized the increasing volume potential, we knew we were in trouble. Our manual assembly line, consisting of four stations and rotating five people per shift, could produce no more than 15,000 caps per week. The 4.5-second leak test, which lost additional time in the manual transfer from and back to the assembly line, and the manual load and unload at the fixture was far too slow, yielding about 20 caps per minute at best. To fix this bottleneck, we began working with PHED Corp., the local systems integrator that built the original APTIMA assembly equipment.
At first, we envisioned an automatic version of the manual pressure test that we had been using, simply automating the loading and unloading of the 10-up fixture. However, the potential to scrap large quantities of good product was unacceptable. The vendor that had supplied our original leak tester to PHED Corp. couldn't seem to come up with a single unit that met our proposed rated speed, so we opened up the process to three separate leak-testing system suppliers, evaluating each one through a formal Kepner-Tregoe (K-T) analysis, the standard decision-making process used throughout Hologic.
This K-T analysis factors in a wide range of "must-haves" and "wants," which in our case put highest priority on single-unit testing, cutting test time down to 1.5 seconds, and having the system up and running within six weeks. Hologic was also interested in ready tech support to help in integrating the leak-testing function into the total assembly system.
Under Pressure
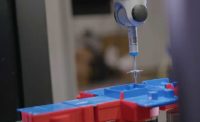
By this time, PHED was well along in designing the new assembly-test machine as an in-line system that would receive cap blanks from a centrifugal bowl feeder, load them onto conveyor pallets in pairs, threaded-end down, then advance the pallets through a sequence of stations including a leak-testing station positioned immediately after induction welding. To keep machine design as simple as possible, all assembling and testing functions would be performed from above the pallets.
As one of its first contributions, InterTech Development Co. (IDC), our chosen tester supplier, pointed out that the caps would be arriving upside-down for the kind of pressure test we envisioned. This is because, although APTIMA sample tubes are not inherently pressurized, they are often shipped by air, and subjected to a low-pressure environment. It therefore makes sense that our cap seal tests should be pressurized from the open, threaded end, to simulate the pressure differential likely to build up inside the sealed tubes due to lower ambient pressures during flight. In our machine, the open end was facing down: the wrong way.
In fact, air-shipment considerations are what determined our 10-psi test pressure in the first place. We researched Federal Express temperature and pressure standards for cargo holds in various types of aircraft flying at different altitudes, calculated the highest probable differential and added a conservative margin of safety to arrive at our spec.
Sucking It Up
To avoid adding complexity to our assembly line, IDC proposed replacing the pressure test-which would have to be performed from below-with a -10 psig vacuum test performed from above. In addition, switching to vacuum technology made it easier to meet the 1.5-second test cycle time requirement, in part because a vacuum inherently requires less stabilizing than pressurization does. Finally, the vacuum environment prompts quicker fixture-to-part sealing, which helps reduce seal stabilization time.
To implement this new approach, InterTech customized its M-1045 computerized pressure-decay leak detector to measure low-level vacuum rise in low-volume test parts. It also collaborated with PHED on the assembly machine's leak testing fixtures for best possible coordination among instrument, fixtures and test circuit.
When the test fixture descends and seals against the top of the cap, it encloses a test cavity slightly less than 0.5 cc from which the tester draws its vacuum. Any leakage reveals itself through a rise, or weakening, of the vacuum. In order to provide a volumetric leak-rate measurement traceable to an industry standard that accounts for test-part volume, the tester converts its vacuum-rise measurement into metric units (standard cubic centimeters per minute, or sccm), and reports this value numerically on its front panel display. Hologic's previous acceptance limit of 0.007 psig, programmed into the M-1075 via front panel keypad, converts to 0.343 sccm.
In addition to real-time test vacuum and leak-rate values, the tester's front-panel lighted indicators also show amber for test in progress, green for accept and red for reject, providing an immediate visual alert requiring no operator judgment. The instrument responds to and shares its information with the assembly machine's PLC through its bidirectional RS232C interface.
All Together Now
In its final configuration, our assembly system incorporates a pair of M-1045 instruments mounted side-by-side to test two caps simultaneously. Whenever a cap fails, it is tagged electronically to prevent any further assembly. This avoids the waste of adding a filter and second seal further downstream. The placement of the filter pile and top seal are also inspected using a machine vision system from Keyence Corp. As with the leak test, the caps are tagged after inspection to guide further machine activity. At the end of the line, separate accept and reject chutes arc down over the passing pallets. Based on the tagging by the leak tester and machine vision systems, puffs of air from below blow each cap into the appropriate chute for collection in separate bins.
Although we have yet to calculate the precise material cost savings resulting from inhibiting the completion of caps rejected in the leak tests, we know some savings exist. Production records indicate an overall machine reject rate of between 0.5 and 2 percent, with one-third to one-half of the rejects recorded at the leak-testing stations. Among the leak rejects, we've also had instances where the rejection was due to wear on the fixture seal rather than a defective cap. Thanks to a seal-check feature built into the leak tester, though, we've been able to detect and fix this kind of systemic problem very quickly, preventing a high number of false rejections.
Hologic also incorporated a handheld CalMaster calibration instrument into the line, mounting it behind a swing-out panel adjacent to the two leak testers, to keep it out of the way but handy for periodic recalibrations. The instrument conveniently plugs into a calibration port on each of the testers and provides immediate leakage-rate readings traceable to National Institute of Standards and Technology (NIST) 0.2-percent primary standards, with repeatability of 0.05 percent. If the testers start seeing an unusual number of rejects, the system alerts the operators so they can check on it. Without this capability, we could be rejecting good caps due to an incomplete gasket seal or worn component. Calibration measurements are displayed by LCD readout in sccm to three decimal places. IDC recommends recalibrating once a day, but we've found that the leak testers are so stable that we have extended the daily recalibrations to weekly recalibrating.
Buying both the test and calibration systems from the same source has made it that much easier to ensure they work well together. Together, they not only give us accept and reject counts, but continuous confirmation that the entire leak-test system, including fixtures and seals, is functioning properly-and if not, why not.
When we began this project, we believed that 10-up testing would be the best way of overcoming slow test cycles. But doing rapid, precise individual testing has proved to be much a much better solution. Our new system produces more than 175,000 caps per week-almost 12 times more than in the past-and requires only two workers to operate. It also greatly reduces the time cost of controlling waste, because with 10-up testing, if any cap failed, all 10 would need retesting to save the ones that didn't. Now, only the bad ones are tossed, without question.
Looking for a reprint of this article?
From high-res PDFs to custom plaques, order your copy today!


